

Thursday, May 29, 2008

Sunday, May 25, 2008
Find visited urls and cookies of every user in index.dat
When you delete the visited urls and the cache in Internet Explorer after disconnecting your computer from the internet you are safe, right ? Many users think that it is impossible to find out which websites have been visited when they delete the cache and the history. This is not true..
The file index.dat which exists many times on windows xp accounts, to be precise many times for every user, stores visited urls and cookies for instance even though you deleted that information before. Microsoft surely has a good explanation for this, right ? They say it is to speed up Internet Explorer but this sounds somewhat fishy, why would you need for instance the cookies if you have deleted them ?
To find index.dat on your computer you need to do the following (Win xo only). Open any folder, click on tools, folder options. Select view from the tab and uncheck “hide protected operating system files” and make sure “Show hidden files and folders is enabled”. Now search for index.dat and windows will come up with some search results.
It does help to view the file in an normal editor, it won’t show anything. What you need to do to see the list of urls or cookies is to download the sweet little tool Pasco created by Keith Jones. It is a freeware command line utility. Unpack it, copy any of the index.dat files into the bin dir of pasco and fire up the command line mode of windows xp. (Hit Windows key + R, enter cmd and hit enter)
Change to the pasco dir and enter the following command:
pasco index.dat > urls.txt
Pasco creates a text file with all urls that are saved in the index.dat file. You can then view the with every text editor available. The same works with the index.dat that holds the cookies of course.
Ever wanted to know what your kids, husband, wife, friends, co-workers do when they are alone ? Use the index.dat file to find out.
How to remove the index.dat file:
The index.dat file is protected in windows and you will have a hard time deleting it from within.
These data files are used by Internet Explorer and Windows Explorer. You cannot delete a file that is in use by a running program. If you feel you need to delete the file, you will have to shutdown all instances of Explorer and IE. This includes applications that may host the Webbrowser control: Outlook, Messenger, IE, Product Studio, Visual Studio, Help, Windows Media Player, etc. Your best bet is just close everything. When you are left with a desktop and a start menu, you will still need to shutdown Explorer. To cleanly shutdown Explorer: Start->Shutdown->CTRL+ALT+SHIFT+Click ‘Cancel’ (for more info, see this post). You can use Task Manager (CTRL+SHIFT+ESC, File->Run…) at this point to open a command window. You should be able to go delete the index.dat. I have only tried this on XPSP2, but it should work anywhere.
Another way would be to boot either into safemode or dos to kill the file.
The new Internet Explorer 7 apparently fixes this issueReveal Saved Internet Explorer Passwords
It is very convenient to save login passwords for internet sites such as forums, blogs or paysites to login quicker to those websites. That is, it is great until you can’t remember the password anymore but would like to know it again. This could be the case if you want to switch from Internet Explorer to Firefox or Opera for instance. Protected Storage Pass View does not only reveal passwords that have been saved in Internet Explorer while accessing protected sites or using the auto complete form but also passwords that have been saved in Outlook Express and MSN Explorer.

All of the passwords are encrypted and possibly hidden in the registry and Pass View automatically scans and displays all the information that it can find in the registry. Internet Explorer passwords are shown next to the url and the username which is all the information one needs to access the site again.
Please note that only the passwords of the user who is currently logged into the system are revealed in this manner. Click here to download protected storage pass view and ie pass view.
IE7 pro Add-on for Internet Explorer
I’m not using Internet Explorer 7 at all but I know some guys who like it so much that they might ditch Firefox for it. The new Internet Explorer 7 has basically the same functionality and expandability as Firefox. You can download add-ons for Internet Explorer 7 to add functions to it. The Windows Marketplace lists more than 550 add-ons for Internet Explorer 7. The major difference that I can see is that Microsoft offers free and commercial add-ons for Internet Explorer 7 while I do not know of a single Firefox add-on that is commercial. (correct me if I’m wrong)
IE7 pro is one of those add-ons that everyone can download for free from its own website or the Windows Marketplace. It adds six new features to Internet Explorer 7, those are: Ad Filter, Super Drag and Drop, Mouse Gestures, Save Page to Image, Quick Switch Proxy and Enhanced Tabbed Browsing Capabilities. Save Page to Image is a very interesting add-on. It makes it possible to save the page as an image and choose from various image formats including jpg and png.
The Ad Filter should be useful for all Internet Explorer 7 users as well and Enhanced Tabbed Browsing Capabilities add eight new functions to it like hiding the search bar, enabling crash recovery and opening new tabs from the address bar.
I never used Mouse Gestures and think that this is a pretty useless feature but some guys seem to like it. Super Drag and Drop is very much like Super Drag and Go, the Firefox add-on. The only difference is that the Internet Explorer 7 add-on can’t save images by dragging them some inches.
Internet Explorer 7 users should take a look at IE7 pro and test it for a while. It is a free add-on and can be uninstalled without problems if you feel that you do not need the functionality.
Improve Internet Explorer with IE Surfgear
Tiny text that can’t be changed. Background textures that hurt your eyes. A font color with a low contrast to the background color, e.g. dark blue font on dark background. I guess we all have experienced websites that had a design like this, always thought it was there to hurt the visitor because I could not think of any other reason why someone would do things like that.
IE Surfgear to the rescue. The tiny program adds three functions accessible through buttons to the Microsoft Internet Explorer. Each button resolves on of the problems mentioned above. The first button automatically changes the font size of tiny text (and only of it, normal sized text will remain untouched) on a website to an average one, the next removes background colors of text on a website and the last removes background textures (including colors) that make text hardly readable.
The author was so nice to add a live demonstration on his website where you can try the buttons and see what they do. The buttons should be available right away after installing IE Surfgear, if they are not you have to customize the Internet Explorer toolbar to add them (or only some of them) to it.
Click on Tools > Toolbars > Customize to add the buttons to your toolbar if they are not displayed after installation.
Funny side note. I did find the link to the program at Shell Extension City which is in my opinion a hard to read website with their black background and grey text. Take a look at the before and after (using the buttons) screenshots of the website.
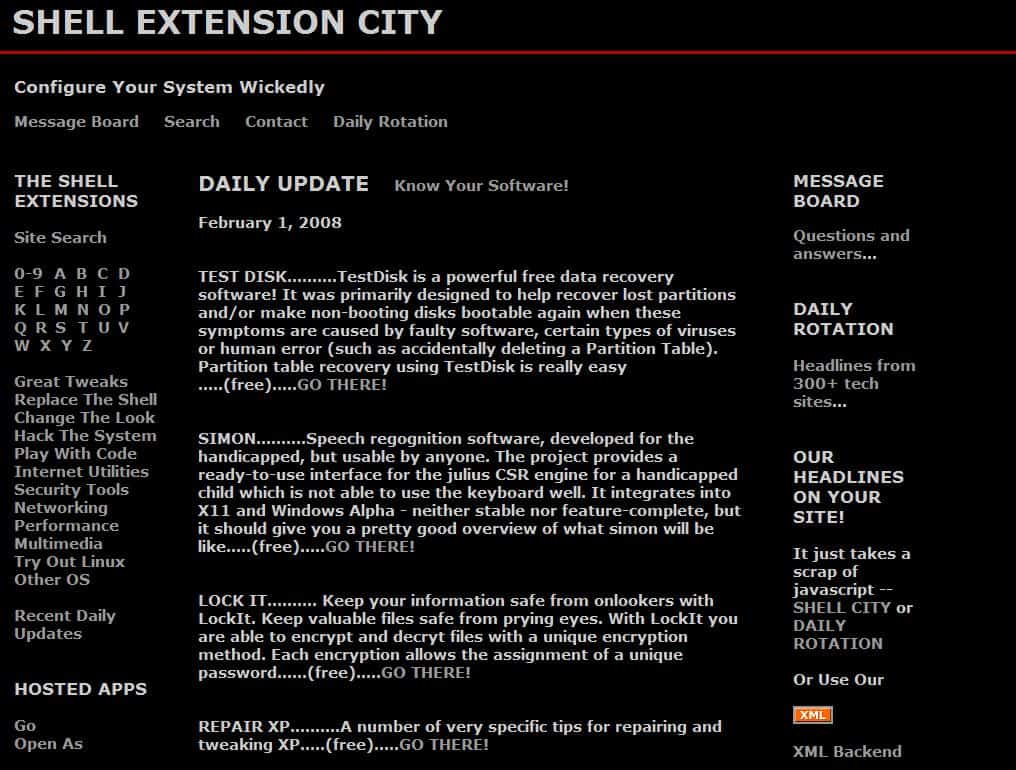

That’s a visible difference, don’t you think ?
Speed Test: Firefox 3 vs. IE 8 vs Opera 9.5
I have not done any tests lately that would reveal the speed of each of the new upcoming browsers. The latest official builds have been tested, they are at the time of the test: Opera 9.5 build 9815/1834, Firefox 3 Gran Paradiso beta 4 and Internet Explorer 8 beta 1. I have been using the Webwait application for this test which monitors page loading times of pages that you select.
All browsers were already in memory and the following pages were each loaded once to avoid cache issues: Digg, CNN, Ghacks and Facebook. The results were pretty astonishing and I’m still thinking that some of the slow loading times might have been caused by a server hickup or a short prob with my Internet connection although I did not see any signs for that on my part. Another possible cause could be add-ons that have are already working in Firefox.
The most astonishing values are two page loading times of Firefox 3. It tool 13.17 seconds to load Digg while Opera needed 5.59 seconds and Internet Explorer 8 only 5.28 seconds. The second huge difference was encountered on Facebook where Opera 9.5 was the fastest browser with a loading time of 1.95 seconds.
Internet Explorer 8 followed with 2.83 seconds and Firefox 3 needed 22.60 seconds to load the page. Firefox on the other hand was the fastest browser when loading my site with 1.9 seconds followed by Opera with 2.38 and Internet Explorer with 4.83 seconds.
The same can be said for the loading time of CNN where Firefox needed 2.94 seocnds, Opera 3.38 seconds and Internet Explorer 8 4.58 seconds.
The only two values that stick out are the Firefox loading times of Facebook and Digg. Anyone here who would like to test the speeds on their connection and post the results in this thread ?
Export Internet Explorer’s Trusted and Restricted Sites
Part of the security concept of Microsoft’s Internet Explorer are the zones which define security settings for Internet, Local Intranet, Trusted Sites and Restricted Sites. The settings for Internet and Local Intranet are global settings which are valid for all websites visited if they are not found in the Trusted or Restricted Sites list. Trusted and Restricted Sites can have different security settings which normally means lower security settings for trusted sites and higher ones for restricted websites.
You would for instance add websites like that of your bank, insurance company or even shopping sites like eBay or Amazon to the list of trusted websites while untrusted websites like Altavista would land in the untrusted sites list. The list grows quite a bit if you make use of that feature and primarily use Internet Explorer when surfing the Internet.
It would be quite redundant to add all websites again if you purchase a new computer, be it a new desktop computer or notebook. A far better solution - besides making the switch to Opera or Firefox - would be to export the zone settings and import them again in the new computer.
All domains are stored in the Registry and what you need to do is export the Registry key from the old computer and import it at the new one. Sounds easy right ? Start by opening your Registry Editor. I do it by using the shortcut Windows R, entering regedit and hitting enter.
Navigate to the Registry key HKEY_CURRENT_USER \Software \Microsoft \Windows \CurrentVersion \Internet Settings \ZoneMap \Domains and right-click the key Domains. Select Export from the menu and save it to your hard drive. Copy the saved file to the new computer and double-click it there to add it to the Registry. Et voila, you are done.
Don’t install IE7 before Windows XP SP3
The Windows XP Service Pack 3 is available again and many users have already made the switch to protect their system with the latest security updates. If you have installed Internet Explorer 7 before updating the system to the third Service Pack and decided to uninstall it again you might have noticed that the option to uninstall the browser is grayed out and therefor not possible.
The reason for this behavior is that the system would revert back to an older version of Internet Explorer 6 that would not contain the patches applied by the Service Pack. The Windows XP Service Pack 3 updates the version of Internet Explorer installed on the system during installation of the Service Pack.
The only possible way to uninstall Internet Explorer 7 that has been installed before installing Service Pack 3 is to uninstall the Service Pack first and then Internet Explorer 7. Microsoft suggests that users of IE6 should update their system with Service Pack 3 first and install IE7 afterwards. This would ensure that the browser could be uninstalled normally.
I’m sure that not many users will run into this problem but some surely will. An alternative would be to switch to another browser like Opera or Firefox if you do not feel like uninstalling the Service Pack to uninstall IE7 is worth it.
Another Rapidshare Timelimit Hack
Rapidshare.de, beloved for its content and hated for its timelimit. Hacks how to circumvent the time limit have been discovered and been put to rest by updates to its scripts. There is nevertheless a constant strife for additional hacks that remove the time limit and let you download without the waiting time.
A new trick was posted here today. Its fast and easy, all you need to do is follow this three steps:
1. Visit the page of the file that you want to download.
2. Click on free.
3. Enter the following line of code into your address bar and remove everything else
javascript:alert(c=1)
Hit enter. A popup showing 1 should appear. click ok, the window disappears and you have to enter some letters and click start download.
RAPIDSHARE HACKS, Downloads, Tools and Searches
Rapidshare hacks, downloaders for rapidshare, no timelimit, unlimited downloads, free premium accounts. Those are some of the keywords that users are looking for. I thought it would be nice to write a definite guide about rapidshare. Which rapidshare hacks, tools and tricks are working, which are not. Rapidshare imposes a download and timelimit on non premium users of their service. Downloading from Rapidshare is only possible with one connection at a time and rapidshare limits the size of the files that you download to 30 megabytes every hour.
Rapidshare Hacks:
Speaking of Rapidshare Hacks: There is one little rapidshare hack available which sets the timelimit you have to wait to 0. Clear your address bar and add the following line to it “javascript:alert(c=0)”. This sets the rapidshare timelimit to 0 but does not change the download limit. The only way to reset the rapidshare download limit is to make rapidshare.de believe you are a new user. This can be done by either reconnecting to your ISP or by using proxys.
Reconnecting to your ISP is only working if they give out dynamic (changing) IPs to their users, if you have a static IP you will have to use proxies. You can check your ip here. Rapidshare sets a cookie which you will have to delete as well. (In Firefox go to Tools, Options. Select Privacy, Cookies, View Cookies and delete all rapidshare cookies.)
You can try the following commands instead of reconnecting. Open the windows command line (Start, Run, enter cmd, hit enter). Type the following commands, hit enter after each line:
| Windows | Mac | Linux |
| ipconfig /flushdns | let me know | restart nscd daemon |
| ipconfig /release | let me know | sudo ifconfig en0 down |
| ipconfig /renew | let me know | sudo ifconfig en0 down;sudo ifconfig en0 up |
If your IP remains the same you probably have a static IP that does not change at all. Your only option to avoid the rapidshare download limit is to use proxies and still clear the cookies in the browser that you are using. Do a search on google for “proxy lists” and you will find heaps of websites that offer proxies. Not all of them are working and you will have to verify that the proxy is a) fast enough and b) does not spill your real IP.
To do that you can simply add the proxy to your connections menu and try it out. Lookup your ip and see if the page loads fast. If you recieve errors or you see your real IP you have to find another proxy.
Rapidshare Tools:
Tools provide some additional features like managing the downloads, changing proxies, simultanious downloads by using more than one proxy and much more. Let us take a look at some of the rapidshare tools:
Rapidshare Link Grab Helper, the password for the rar file is “webxposed.de”. A pretty basic rapidshare tool. Add a rapidshare link, add a proxy, click grab, enter the image verification code, sent the rapidhare direct link to flashget.
Rapget, supports not only rapidshare.de but many other file hosting services like megaupload.com for example. The program has more options, it allows you to select a proxy list that it uses automatically while downloading from rapidshare or the other services. It offers simultanious rapidshare downloads, you can set timeouts, schedule downloads and paste links from files or the clipboard.
Grabber, looks similar to the rapidshare link grab helper with some additional options such as proxy and link checking.
Rapidleecher, offers basic functionality. Copy links, use proxies, enter image verification, get real download link and download the file.
Rapidshare Searches:
You need links to download files from rapidshare. One common method is to use google to search rapidshare.de by using googles site search command.
site:rapidshare.de RAR
This would search rapidshare.de for every link / page that includes the word rar.
You can also search google for sites that index rapidshare downloads, I won´t get into detail about those sites because they mostly link to illegal downloads. Try the search string “rapidshare links” for example.
Rapidshare Free Premium Accounts:
Rapidshare sometimes promotes free premium accounts. Head over to this rapidshare link to check if they currently offer free premium accounts.
Ten Windows Keyboard Shortcuts I cannot live without
When I’m helping friends and family members who are not that tech savvy with their computers I always notice that they do not use keyboard shortcuts. Instead of doing the plain old CTRL C, CTRL V to copy and paste selected text they use the mouse to do that. Thinking about this for a while I thought it might be useful to list ten Windows keyboard shortcuts that I cannot live without.
It hopefully might help some users who are starting to work with Windows and probably even some users who rely on the mouse to do everything in Windows. But before I start I would like to explain the reason why I’m using keyboard shortcuts in certain situations and not the mouse.
The main advantage of a keyboard shortcut is speed. Take the copy and paste example. A user who is using the mouse marks the text that he wants to copy, presses the right mouse button, selects copy from the list, moves to the new document where he wants to paste it, right-clicks the mouse again and selects paste.
Using keyboard shortcuts instead makes the right-click part of the process obsolete. Lets start with the Ten Windows Keyboard Shortcuts I cannot live without.
- CTRL C / CTRL V: This one is obvious and probably the most used keyboard shortcut in the world. CTRL C copies whatever is currently marked and CTRL V pastes the contents again. (C for Copy, V for Verbose)
- CTRL A: The copy and paste shortcuts work well with this one. CTRL A selects all.
- ALT F4: Closes the active window
- F3: This one opens the Windows Search.
- ALT TAB: Switches between open applications.
- CTRL P: Opens the Print Screen dialog.
- F2: Rename the active item
- CTRL ESC: Displays the Windows Start Menu.
- SHIFT DEL: Deletes the item immediately without moving it into the trashbin
- TAB: Move to the next control, excellent for forms.
- Spacebar: Checks a checkbox, presses a button if on a button, selects an option if on an option
- Return, ESC: Those are single shortcuts. Return is used perform the active command while ESC cancels the current task.
Those are my ten. Remember it’s only for Windows and not specific applications like Firefox (I would definitely have mentioned F11 then for example). If you find different Windows shortcuts noteworthy let me know please.
Rapidshare Happy Hours
Rapidshare have implemented a new captcha for some time that asks the user to enter four out of x letters that have a cat (others have a similar looking picture of a dog with a smaller head) in the background. This new captcha is confusing to users and many have decided that it is not worth the trouble.
One solution is to wait for the so called Rapidshare Happy Hours which allow downloading without filling out the captchas and no waiting time if the servers can handle the download. Rapidshare Happy Hours are active between 0:00 - 18:00 UTC+1 on Mondays to Fridays and 0:00 - 14:00 UTC+1 on Saturdays and Sundays.
If you are a heavy Rapidshare user you might find the Firefox add-on Happy Checker useful which notifies the user when the Rapidshare Happy Hour is active. I think that it should not be to hard to memorize the Happy Hour times and download from Rapidshare in those times only without installing yet another Firefox extension.
Reinstall Windows Xp in Unattended Mode
Sometimes you feel like reinstalling windows Xp, but you think of all the softwares and application installed on your computer. You will then be required to reinstall all of them.
Now there is a way to reinstall windows Xp, where in you can keep all the installed application and all the personal settings. Its simple and easy, just follow these steps.
Before moving ahead, make sure that CD-Rom in NOT your first boot device.
- Login to Xp and Insert you Windows Xp disk in your drive.
- Go to Command Prompt, and go to the drive(eg:- d:> assuming D is your CD drive.)
- Then go to i386 folder(d:/i386>) and then type in the command prompt “WINNT32 /unattend”.
- You will then see a setup starts running, which reinstalls the Windows on your computer, without harnessing your installed application and settings, and the too in unattended mode.
Hello guys, It’s Readers Query time again. This time one of our reader faced a problem of missing Boot.ini file. The computer was not able to boot because it was not able to find the proper location of the boot files, thus creating a problem. But for this simple reason, you cannot format your computer, and when you know its just a small file. What can then be done?
Usually when this file is deleted, it automatically rewrites a new file, and this booting the system. But in this case, it was not. Whats the solution then ?
Well, to this problem what can be done is booting XP from a external device, be it Floppy, Pen drive or even a Disk. You just need to copy the booting files into these devices, and all is then controlled by XP.
You need to have a second computer, in case your computer is down too. But if it is healthy and doing good, prepare a copy NOW !!!

If in case you need to write the whole code of this file, Follow this small tutorial for the same.
That’s it You can then boot your computer from any external device.
Editing The Boot.ini File
Boot.ini file is an initialization file, but editing it for some people has been a bad experience. In this post i will let you know the codes and their meaning and also how to edit them easily. By default this is hidden in Xp, but in case of win 98, it can be searched.
To access the file in Xp :-
- Right click on My Computer and select Properties.
- Go to the Advanced tab and click Settings in Startup and Recovery section.
- Click Edit and you will see the Boot.ini file opened in a notepad.
Now File says something like this
[boot loader]
timeout=30
default=multi(0)disk(0)rdisk(0)partition(1)\WINDOWS
[operating systems]
multi(0)disk(0)rdisk(0)partition(1)\WINDOWS=”Microsoft Windows XP Professional” /fastdetect
timeout=30 is the time that will be provided to you to select from the list of OS’s installed. This works only in case you have multiple OS’s installed. It can be reduced easily, but make sure you give enough time to react upon it. 10 Seconds is the appropriate time.
The third line says multi(0)disk(0)rdisk(0)partition(1)\WINDOWS=”Microsoft Windows XP Professional” /fastdetect. multi(0) tells us the IDE on which the drive is attached to. Usually its Primary only. disk(0) shows the number of Hard disks mounted. rdisk(0) tells us from which disk it is booting. In case of SCSI drives, it might not show up. partition(1) tell that on which Logical partition the OS is installed on.
After that it says “Microsoft Windows XP Professional” that is the name that shows up on the OS selection page. You can put your own name there as well.
This was the editable part of Boot.ini file.
Now in case if you delete the file accidentally then you need not worry, you don’t need to create the file again. Xp will create a file of its own, and your system is safe.
But in case if someone edits it and puts in the wrong information, then it you system will find the file but not the correct path. So that might harm your Computer.
So, this was a small post on Boot.ini file and its editing. IF you got anything more to say or add, Do Comment.
Saturday, May 24, 2008
Bit Defender Antivirus 2008 and Kaspersky Internet Security 6 Months Trials
I have been watching the extended trials that almost every security vendor is giving away. But I was never interested in the offers as I had a full version of NOD32 Internet Security Suite. That was more than enough for me. I have been using NOD32 for a long time now and I love it. It’s like set it and forget it. But it started creating problems for me today. One of it’s modules was crashing continuously. Instead of looking into the problem, I straight away decided to install and test a new antivirus. I didn’t want to buy a new Antivirus so I decided to opt for a 6 months trial of Kaspersky Internet Security which would be more than enough for me. And I also want to share with my readers about how to get 6 months trial of Kaspersky or Bitdefender. So here’s the process for the two popular antiviruses.
Kaspersky Internet Security
Just go to the following URL:
http://www.kaspersky.com/de/20814_72814_329.html
On this page, you will find an activation code and the download link to Kaspersky Internet Security version 7.0.1.325 (at the time of publishing this article).

Download the software and then install it. When asked for Activation key, select “Activate using activation key” and press Next. Then give the activation key that you found on the webpage. This will install Kaspersky Internet Security 6 months trial. Stay happy ![]()
BitDefender 2008
Just go to the following URL:
http://www.bitdefender.com/site/Promotions/event08/
This page is in Italian but you only have to enter the following sequentially:
First Name
Last Name
Product
Verification code
And you’ll get the license key of your selected Bitdefender product trial for 6 months.
How To Remove Boot.vbs Virus
Today my antivirus (NOD32 Security Suite) was creating troubles for me. After every five minutes, a request to debug the application would appear because the some module of NOD32 would crash and then reload. It has been a long time that I have been using NOD32. So I decided to test some other antivirus. There were two good choices for me. One Bitdefender and then second Kaspersky. The problem was that I didn’t want to buy any one of those. So I decided to use a 6 months trial of Kaspersky Internet Security which will be more than enough for me to test it. Here is my previous article about how to get Kaspersky Internet Secutiry trial of 6 months.
I downloaded it and installed it. It began scanning my PC. And to my amazement, it detected a threat that NOD32 was unaware of!! It was the boot.vbs virus. I thought it would be better to remove the virus manually rather than relying on Kaspersky. That way I would learn more. So here are the steps which I did to remove the boot.vbs virus:
- Go to Task Manager –> Processes and End the following processes in order:
- dxdlg.exe
- wscript.exe
- Go to Start –> Run –> regedit –> Open the following key:
HKEY_LOCAL_MACHINE\SOFTWARE\Microsoft\Windows NT\CurrentVersion\Winlogon - In the right hand pane, select Userinit and delete everything except “C:\windows\system32\userinit.exe”

- Make sure the processes wscript.exe and dxdlg.exe are not running.
- Delete the following files
- C:\Windows\System32\dxdlg.exe
- C:\Windows\System32\boot.vbs
- Restart your computer.

Hopefully everything will be cleaner now and your computer will be free from boot.vbs virus :-). Please share your experiences.
Thursday, May 15, 2008
Windows Xp Tips and Tricks
Tip 1: How To Make an Invisible Folder
- Create a new folder and rename it as: ALT 0160.
- Change the icon from properties and the folder is invisible.
Tip 2: How To Create a Prank Virus
- Open a notebad and copy-paste the following:
@echo off
echo YOU HAVE A VIRUS ON YOUR COMPUTER
pause
echo CONTATTING ANTIVIRUS
pause
echo DO YOU WANT TO DELETE ANTIVIRUS?
pause
echo ACCESS DENIED
echo ACCESS DENIED
echo ACCESS DENIED
pause
echo ACTIVATING VIRUS
echo VIRUS ACTIVATED
pause
:1
dir/s
goto 1
- Save it as: """"""""".bat
Tip 3: Windows Xp Secret Song
- Go to My Computer
- Open Folder Images and search a file called: "title"
- Open the file and enjoy the windows
 xp secret song
How To Hack into Live Web Cams
Google "gives" us the opportunity to hack live webcams wherever they are and sometimes even control them. Just follow the steps below:
- Type in Google's search box: inurl:/view/index.shtml
- Type in Google's search box: inurl:"viewerframe?mode=refresh"
HIT ENTER
The result is urls of thousands of live webcams which anyone can access and even control sometimes!!!
The Video examines some of the webcams..Take a look!
How To Hack a Cd-Rom Drive
There is a code in VBS which helps you to hack , and open the tray of a cd-rom drive whenever it remains closed in few steps:
- Open a notepad and paste the following code: do
Set oWMP = CreateObject("WMPlayer.OCX.7" )
Set colCDROMs = oWMP.cdromCollection
if colCDROMs.Count >= 1 then
For i = 0 to colCDROMs.Count - 1
colCDROMs.Item(i).Eject
Next ' cdrom
End If
loop - Save the code as: xxx.vbs(where xxx:any name)
- Now once you double click the saved file,your Cd-Rom drive will open whenever it is closed!
Download Free Mp3 from Google
Wednesday, May 14, 2008
50 Windows Tips & Tricks -5
41 Move My Documents (XP)
Now that hard disks are larger and cheaper than ever, it’s easy to keep documents and programs separate. If you’ve added a new hard disk, it’s easy to move the My Documents folder over to it. Click the Start button, right-click My Documents and select Properties. Click the Move button and then choose a folder on the new disk. Click OK once again and click Yes to move existing documents to the new folder.
42 Create XPS documents (Vista)
Much like PDF files, XPS documents created in Windows Vista will look the same on any computer used to view them. Any document can be converted to XPS format. To do this choose to print the file, then select the XPS Document Writer. XPS files can be opened and viewed in Internet Explorer 7, or using the free XPS viewer program. This can be downloaded.
43 Restore Preview option to image files (XP)
By default, Windows XP uses its own image preview tool if you double-click an image file. Annoyingly, though, other programs will sometimes take over so double-clicking an image opens that program instead. For those who prefer the preview tool, open the Control Panel, then Folder Options. Select the File Types tab, and scroll down to find the file type in question, such as JPG, then click the Restore button.
44 Disable Windows Defender (Vista)
Windows Vista includes a tool that helps to protect Windows Vista against spyware. If you prefer to use another program to defend against spyware it’s possible to disable Defender. Launch Windows Defender from the Start menu and click Tools, then Options. Scroll down to the bottom of the list and untick the box labelled ‘Use Windows Defender’ before clicking Save.
45 Different web browser for each user (XP)
Windows XP remembers which web browser you prefer to use, but if several different users share a computer it annoyingly assumes they all prefer the same one. To allow different users to choose different web browsers, download a free copy of the DefaultBrowser tool. Double-click the ZIP file and copy the defaultbrowser.exe file to somewhere safe on the hard disk.
Each user can now double-click this program file and select a browser from the menu.
46 Watch your network (Vista)
Vista includes a handy tool that gives a quick visual indication of how busy a home network is. Look for the network icon in the notification area at the bottom right-hand corner of the screen – this looks like two computer monitors, one in front of the other. Right-click it, and select ‘Turn on activity animation’ – the icon will now show when the network is busy.
47 Manage notification area icons (XP)
If you install lots of programs on your computer, the notification area in the bottom right-hand corner of the screen can become full. To make it more manageable, right-click the Taskbar, select Properties and tick the box labelled ‘Hide inactive icons’. This generally works well, but sometimes useful icons can disappear.
If this happens, right-click the Taskbar and select Properties again, then click the Customize button. Click the icon you want to see, then select ‘Always Show’ from the menu to its right and click OK.
48 Copy file location (Vista)
Sometimes it’s useful to know where a file is stored. It’s possible to type the location of a file manually, but this can lead to errors. Instead click Start, select Computer and navigate to the file in question. Hold down the Shift key and right-click the file, then select the option to ‘Copy as Path’. It’s now easy to insert the file location into an email or document – choose paste from the menu or press the Control and V keys together.
49 Advanced Autoplay (XP)
When you insert a CD or DVD into a Windows XP computer, Windows will pop up an Autoplay window asking you what to do with it. This can be very handy, but if you want to do the same thing each time it can be skipped. Open My Computer, right-click on the CD or DVD drive and select Properties, then click the Autoplay tab.
Select a type of file from the dropdown menu, then choose the action you want the computer to perform from the list below it. For example, we like to set ‘Mixed Content’ discs so Windows will ‘Open folder to view files’ without asking us each time. Different options can be set for each different type of files.
50 Quick internet test (XP)
Sometimes it can be hard to tell whether a broadband internet connection is broken, or whether there’s a problem with your web browser. For a quick way to tell, press the Windows key and R together to launch the Run box, then type cmd and press Enter. A black window will appear. Type ping www.computeractive.co.uk and press Enter. Windows will attempt to connect to our website.
50 Windows Tips & Tricks -4
31 Keep track of notes
It’s easy to lose notes kept on scraps of paper, so why not keep them handy on the desktop? Right-click the desktop, select New then Text Document. Call it ‘notes’. From now on, to make a note simply double-click the file, press F5 to insert the date and time, type a note then press the Control and S keys together to save.
32 Clever keyboard (Vista)
Windows Vista has an on-screen keyboard that can be accessed by pressing the Windows key and the R key together, then typing osk.exe and pressing Enter. For a more useful version, right-click the Taskbar, then select Toolbars followed by Tablet PC Input Panel. Click the icon that appears in the Taskbar, then click the keyboard icon in the dock that appears.
Select ‘Dock at Bottom of Screen’ from the Tools menu to dock this keyboard at the bottom of the screen. When the keyboard is not needed click the usual close button, and to bring it back click the small floating panel to the side of the screen.
33 Add a shortcut for updates (XP)
Windows Update means Windows XP can be set to check for security updates automatically. If you prefer to check yourself, you can create a desktop icon to simplify the process. Right-click an empty spot on the desktop and select New, then Shortcut. In the box that appears type www.windowsupdate.com, then click Next. Enter a name such as ‘Check for updates’ and click Finish.
Simply double-click this icon to start the update process.
34 Change Start menu power button (Vista)
By default, the power button in Vista’s Start menu activates sleep mode rather than switching the computer off. To fix this open the Control Panel, then Power Options, and click the ‘Change plan settings’ link beneath the currently selected power plan. Click ‘Change advanced power settings’ and expand the ‘Power buttons and lid’ entry.
Expand the ‘Start menu power button’ entry, click the menu next to Setting and select Shut down before clicking OK.
35 Type in quick shortcuts (XP)
There are a few programs in Windows that can be very handy but which are hidden in the Start menu. If you’re busy doing something else and don’t want to rummage around in the Accessories folder for the Calculator, though, don’t worry. Simply press the Windows key and R together, type calc and press Enter.
Similarly, for a quick way to start a text file press the Windows key and R together, type notepad then press Enter.
36 Preview documents (Vista)
To save having to open a document to see what it contains, turn on Vista’s file preview option. Open a folder, click the Organize button and select Layout followed by Preview Pane. Select a file, and a preview will be displayed to the right.
37 Give hard disks a friendly name (XP)
If your computer has more than one hard disk, it’s often a good idea to store different files on each one – programs on drive C, for example, and music files on drive D. If so, why not give each disk a friendly name? Open My Computer, right-click the hard disk and select Rename, then type in something appropriate – we called our second disk ‘music and video’.
38 Disable User Account Control (Vista)
Vista’s User Account Control (UAC) is a useful security feature, but some people find it incredibly annoying. It can be disabled. Open the Control Panel, then User Accounts, and click the link labelled ‘Turn user account control on or off’ before clicking Continue. Untick the box labelled ‘Use User Account Control (UAC) to help protect your computer’ and click OK.
Re-enabling UAC is simple – follow these steps again, then re-tick the box.
39 Check your specs (XP)
Sometimes it’s helpful to know some basic information about the parts inside your PC. For details on the processor and memory, right-click the My Computer icon and select Properties. Look at the bottom of the box that appears: under the word ‘Computer’ you’ll find, the type of processor inside, along with its speed (in MHz or GHz), and then the amount of memory, which will look something like ‘512MB of Ram’.
40 Scan again for wireless networks (Vista)
Wireless networks don’t always show up the first time you perform a scan. Vista will re-scan after a while, but there’s no need to wait. Simply press F5 to start another scan immediately.
50 Windows Tips & Tricks -3
21 Reduce window borders (Vista)
Vista’s Aero graphics can give program and folder windows a fairly chunky border. When using a program that has several floating windows, such as image-editing software, the wasted space can become annoying. To shrink the borders down to size, right-click the desktop and select Personalize before clicking ‘Window Color and Appearance’.
If the Appearance Setting dialogue box does not appear, click ‘Open classic appearance properties for more color options’. Click the Advanced button, select Border Padding from the dropdown menu, reduce the size setting to less than 4, then click OK twice.
22 Group Taskbar buttons (XP)
Normally opening more than one copy of the same program will produce more than one button on the Taskbar, and this can mean the Taskbar runs out of space. To make things simpler, it’s possible to group Taskbar buttons from the same program together. To activate this feature, right-click on an empty section of the Taskbar and select Properties. Tick the box labelled ‘Group similar Taskbar buttons’ and click OK.
23 Add links to folder Favorites (Vista)
When viewing folders in Vista the ‘Favorite Links’ panel is displayed to one side. Adding the folders you use most often to this list makes using the computer quicker and easier. Simply drag and drop the folders you use most often onto the ‘Favorite Links’ panel.
24 Access web pages quickly (XP)
Visiting a website is a two-stage process: first open a web browser, then type in the address. To speed things up add an address bar to the Windows Taskbar. Right-click an empty section of the Taskbar – if there is a tick next to ‘Lock the Taskbar’ remove it. Next, hover the mouse over Toolbars and click on Address.
A tiny address bar will appear – type in any website’s address and it will open in your web browser of choice.
26 Use Flip 3D (Vista)
Flip 3D is one of Vista’s most impressive tricks, but many people don’t even know it exists. With several programs or windows open, hold down the Alt key and push the Tab button a few times – Vista will cycle through the windows in a useful but dull way.
Now, try holding down the Windows key and pushing Tab a few times – Vista will use the impressive-looking Flip 3D system to change between the windows, allowing you to view each one as they change.
27 Speed up the Start menu (XP)
When using the Start menu you might notice a delay between clicking a sub-menu and watching it open – this is added deliberately by Windows. It’s possible to remove it, as long as you are a confident computer user happy to edit the Windows Registry. To do so, click Start, then Run, type regedit and press Enter.
Click the plus sign next to HKEY_CURRENT_USER, then click the plus sign next to Control Panel and select Desktop. Look for an entry in the right pane called MenuShowDelay. This has a default value of 400. Right-click it and select Modify – entering a value of between 50 and 100 will speed up the Start menu.
28 Make USB disks faster (Vista)
If you leave your USB hard disk permanently connected, it’s possible to make it faster. Click Start, type Device Manger and click the Device Manager link. Expand the Disk Drives entry, right-click the USB disk icon and select Properties. On the Policies tab tick ‘Optimize for performance’ and click OK.
29 Advanced Windows shortcuts (XP)
Windows XP is full of keyboard shortcuts, but there are a few that every user should know. Hold down the Windows key, then try pressing these letter keys: E will launch Windows Explorer, R will launch the Run box, F will launch the Find utility, M will minimise all open windows to show the desktop, and L will instantly lock the computer.
30 Activate windows without clicking (Vista)
Normally it’s necessary to click a window to make it active, but it is possible to avoid this by using one of Vista’s Ease of Access features. Click Start, open the Control Panel and then choose the ‘Ease of Access Center’. Click the link labelled ‘Make the mouse easier to use’ and then select the option labelled ‘Activate a window by hovering over it with the mouse’. It’s easy to go back and de-select the option if you want.
How To Hide any files into JPG file
There is a trick in windows which gives you the opportunity to hide any type of files in a JPG file.
This simple trick can be achieved in few steps:
- Select the files you want to hide and compress them using winrar,winzip etc...
- Drag the compressed file and a random picture in the same directory(eg. C:\)
- Go to Start-->Run and type cmd in order to open the command promt window
- Go to directory where you have placed the files (type cd.. twice to go to C:\)
- Type:
After that process a new jpg file will be crated in C:\ with the name: new name.
If you double click you will see just the image,but if you right click to the file and select extract,your fidden files will be extracted.
Google Tips and Tricks
Google search engine supports some funny tips and tricks which are listed below. Each of the sentences have a different affect to Googles search engine.
- Type google gothic in the search box and click google right button...
- Type google easter egg in the search box and click google right button..
- Type google Linux in the search box and click google right button..
- Type google bsd in the search box and click google right button..
- Type google 1337 in the search box and click google right button..
- Type google Loco in the search box and click google right button..
How To Hack a Website-The Serious way
You can easily find the passwords of websites that require passwords in order to login.
- In Google Search engine enter "Enter Passwords" in order to find site which require passwords for login.
- Go to main menu-edit and choose View source.
- Here you can see the html code of the site. We are looking for the password value or password name="...".
- Copy the name in the " " and paste it in the field of password.
How To Hack a WebSite--The Funny way
A simple way to hack a website and laugh with your friends.
Of course it is not a real hacking ....
- Open a web browser you use more frequently and open a webpage you like more.
- Copy the code:

and Paste it into the address bar of the browser.
Now you can change anything on the webpage as in a notepad.
Monday, May 12, 2008
50 Windows Tips & Tricks-2
10 Add Run to Start menu (Vista)
After moving from Windows XP to Vista, some people miss the Run option from Windows XP’s Start menu. To add a Run link in Vista right-click on Start, select Properties and move to the Start Menu tab before clicking Customize. Scroll down through the options, tick the box labelled ‘Run command’ and click OK.
11 Make it easier to select files (Vista)
To make it easier to select a number of files or folders, it is possible to add a tick-box feature to all icons. Open a folder and click Organize, then on ‘Folder and Search Options’. Move to the View tab, tick the box labelled ‘Use check boxes to select item’ and click OK.
12 Restore the Show Desktop icon (XP)
The Show Desktop icon in Windows XP’s Quick Launch toolbar is very handy, but it’s also easy to delete. Getting it back is rather convoluted, but Microsoft has provided a guide – scroll down the page and click Download Guided Help. Opt to Run the file, and follow its instructions. For a quicker way to show the desktop, press the Windows key and the M key together.
13 Extend Send To (Vista)
We’ve explained how to add items to the Send To menu in Windows XP numerous times, but the process is a little different in Windows Vista. Open the Control Panel, then Folder Options, then move to the View tab and select the option labelled ‘Show hidden files and folders’ before clicking OK. Now click Start, Computer, and open the C drive.
Open the folder called users, then the one with your user name, then the folders AppData, Roaming, Microsoft, Windows and SendTo. Add any shortcuts you want in the Send To menu to this folder.
14 Hide Recent Documents from Start menu (XP)
The Windows Start menu normally shows which files have been opened most recently. This can be handy, but it’s possible to remove this feature. To do so, right-click the Start button, select Properties and move to the Advanced tab. At the bottom of the dialogue box, untick the option labelled ‘List my most recently opened documents’ and click OK.
15 Quick Launch keyboard shortcuts (Vista)
The Quick Launch bar makes it very easy to start the most frequently used programs. As well as clicking the shortcuts, though, it’s possible to start the programs in Quick Launch using the keyboard. Press the Windows key, then the number key relating to the position of the icon you want – for example, to start the program that’s second from the left in the Quick Launch bar, press the Windows key and 2 together.
16 Access shared folders simply (XP)
It’s possible to make it easier to find shared files on a computer attached to a network. Right-click the My Computer icon in the Start menu, select Map Network Drive then choose a drive letter from the dropdown menu. Click Browse, then navigate to the shared folder and then click Finish. It’ll now be easy to find that shared folder by simply opening My Computer.
17 Permanently show menus (Vista)
When viewing folders in Vista the menu bar is hidden. It can be temporarily restored by pressing the Alt key, but it’s also possible to permanently restore it. With a folder open, click the Organize button and select ‘Folder and Search Options’. Move to the View tab and tick the box labelled ‘Always show menus’ before clicking OK.
18 Disable disk indexing (XP)
Unless you regularly use the Find tool to search for files on your computer, Windows XP’s indexing feature will only slow down the PC. To disable it, right-click the hard disk in My Computer and select Properties. Untick the box labelled ‘Allow Indexing Service to index this drive for fast file searching’, then click OK.
19 Trim Start menu searches (Vista)
Vista’s Start menu can be used to perform searches, but the sheer number of files that are searched can mean dozens of results are produced. To get more control over just what is searched for, right-click the Start button and select Properties. On the Start Menu tab, click the Customize button and untick any options that can safely be ignored. We unticked ‘Search favourites and history’, as we don’t often want to look for these.
Then click OK.
20 Quickly lock Windows (XP)
For security purposes, a computer can be quickly locked by pressing the Windows key and L simultaneously. To make this process even quicker, right-click on the desktop, hover the mouse over New and select Shortcut. In the dialogue box that opens, type rundll32.exe user32.dll,LockWorkStation.
Sending SMS Through Yahoo Mail Free!!
Few days back only i added a free sms sender on this blog and now I just checked and found that Yahoo Mail too has added another feature of sending messages to your Mobile Phone.
Follow the below mentioned steps to send Free SMS using Yahoo Mail.
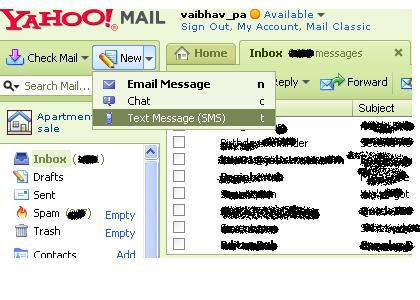
1. Login to your Yahoo Mail account (Yahoo Mail beta and not the classic one)
2. Click on the New Drop down and select TextMessage.
3. Add the number/contact to which you wish to send the message and click on send.
 Its FREE but the catch is that you can only send maximum of 5 sms to a contact after which your contact person needs to reply at least once and then your quota of 5 starts all over again. Although, am not sure of the pricing as far as the reply message is concerned.
This feature is available only for Yahoo users in India,Canada, US and Philippines.
Yahoo mail definitely according to me is going places as compared to Gmail. Lets see who races further ahead in this race of better email service.
Follow the below mentioned steps to send Free SMS using Yahoo Mail.
1. Login to your Yahoo Mail account (Yahoo Mail beta and not the classic one)
2. Click on the New Drop down and select TextMessage.
3. Add the number/contact to which you wish to send the message and click on send.
Its FREE but the catch is that you can only send maximum of 5 sms to a contact after which your contact person needs to reply at least once and then your quota of 5 starts all over again. Although, am not sure of the pricing as far as the reply message is concerned.This feature is available only for Yahoo users in India,Canada, US and Philippines.
Yahoo mail definitely according to me is going places as compared to Gmail. Lets see who races further ahead in this race of better email service.
Track who is sending you email-Gmail/Yahoo/hotmail
When you receive an email, you receive more than just the message. The email comes with headers that carry important information that can tell where the email was sent from and possibly who sent it. For that, you would need to find the IP address of the sender. The tutorial below can help you find the IP address of the sender. Note that this will not work if the sender uses anonymous proxy servers.
First of all, the IP address is generally found in the headers enclosed beween square brackets, for instance, [129.130.1.1]
Finding IP address in Gmail
1. Log into your Gmail account with your username and password.
2. Open the mail.
3. To display the email headers,
* Click on the inverted triangle beside Reply. Select Show Orginal.
4. manually find the IP address, proceed to 5.
5. Look for Received: from followed by the IP address between square brackets [ ].
Received: from [69.138.30.1] by web4587.mail.***.yahoo.com
6. If you find more than one Received: from patterns, select the last one.
7. Track the IP address of the sender
Finding IP address in Yahoo! Mail
1. Log into your Yahoo! mail with your username and password.
2. Click on Inbox or whichever folder you have stored your mail.
3. Open the mail.
4. If you do not see the headers above the mail message, your headers are not displayed. To display the headers,
* Click on Options on the top-right corner
* In the Mail Options page, click on General Preferences
* Scroll down to Messages where you have the Headers option
* Make sure that Show all headers on incoming messages is selected
* Click on the Save button
* Go back to the mails and open that mail
5. You should see similar headers like this:
Or if you want to manually find the IP address, proceed to 7.
7. Look for Received: from followed by the IP address between square brackets [ ]. Here, it is 202.65.138.109.
That is be the IP address of the sender.
If there are many instances of Received: from with the IP address, select the IP address in the last pattern. If there are no instances of Received: from with the IP address, select the first IP address in X-Originating-IP.
8. Track the IP address of the sender
Finding IP address in Hotmail
1. Log into your Hotmail account with your username and password.
2. Click on the Mail tab on the top.
3. Open the mail.
4. If you do not see the headers above the mail message, your headers are not displayed. To display the headers,
* Click on Options on the top-right corner
* In the Mail Options page, click on Mail Display Settings
* In Message Headers, make sure Advanced option is checked
* Click on Ok button
* Go back to the mails and open that mail
5. You should see the email headers now.
6. manually find the IP address, proceed to 7.
7. If you find a header with X-Originating-IP: followed by an IP address, that is the sender's IP address
Hotmail headers
In this case the IP address of the sender is [68.34.60.59]. Jump to step 9.
8. If you find a header with Received: from followed by a Gmail proxy like this
Hotmail headers
Look for Received: from followed by IP address within square brackets[
In this case, the IP address of the sender is [69.140.7.58]. Jump to step 9.
9. Or else if you have headers like this
Hotmail headers
Look for Received: from followed by IP address within square brackets[].
In this case, the IP address of the sender is [61.83.145.129] (Spam mail). Jump to step 9.
10. * If you have multiple Received: from headers, eliminate the ones that have proxy.anyknownserver.com.
11. Track the IP address of the sender
50 Windows Tips & Tricks-1
For most people using a computer means using Windows and over the years Microsoft’s operating system has become easier to use.
However, there is always room for improvement, so in this feature we have compiled 50 of the finest tips for Windows XP and Vista. These can help to make Windows even better, easier to use and faster. Most don’t even require you to install any extra software, so if you want to make your copy of XP or Vista better, it’s possible to get started immediately.
1 Access My Documents from the Taskbar (XP and Vista)
Right-click an empty section of the Taskbar and select toolbars, then New Toolbar. Navigate to the My Documents (XP) or Documents (Vista) folder and click the OK or Select Folder button. In its default position to the far right of the Taskbar, the toolbar provides menu access to the entire contents of the folder.
2 Extra speed with Readyboost (Vista)
Plugging in a USB memory key is one of the easiest ways to speed up Vista. When the Autoplay menu appears, select ‘Speed up my system’, or right-click the drive in Computer and select Properties. Move to the Readyboost tab, tick ‘Use this device’ and use the slider to choose how much space should be given up. Not all USB memory keys are fast enough to provide this boost.
3 Save folders after a crash (XP)
If you have lots of folders open in Windows XP, when one of them crashes, they will all close. This can be avoided by using a hidden option. Open the Control Panel, then choose Folder Options. Move to the View tab and scroll down through the list of options until you get to one called ‘Launch folder windows in a separate process’. Place a tick next to it, then click OK.
4 Disable Aero Glass (Vista)
Vista’s Aero Glass transparency effects may look great, but they also drain a computer’s processing power. To speed up a struggling computer, right-click the desktop and select Personalize. Click the link ‘Window Color and Appearance’ at the top of the screen and untick the ‘Enable transparency’ box before clicking OK.
5 Save memory (XP)
When you run programs, Windows XP stores files known as DLLs in memory. When you close the programs, it usually leaves them there for later use but this can slow down the computer. If you are fine editing the Windows Registry, this can be fixed – but make suitable backups first and take great care. Click Start, then Run, type regedit and press Enter.
Click the plus sign next to HKEY_LOCAL_MACHINE, then SOFTWARE, then Microsoft, Windows, and Current Version. Select the Explorer folder. Click Edit, then New, then DWORD Value. Name the new entry AlwaysUnloadDll, press Enter, then double-click the item and assign it a value of 1. From now, DLL files will be removed from memory when programs are closed.
6 Partition a hard disk (Vista)
Vista makes it possible to divide a hard disk into two or more partitions that Windows sees as separate disks. Click Start, right-click Computer and select the Manage option. Select Disk Management from the left-hand pane, right-click the disk that is to be split and select Shrink Volume. Enter a new size for the partition and click Shrink.
Now right-click the drive space marked as Unallocated and select New Simple Volume. Follow the wizard to create and format the new partition.
7 Make room for Start menu favourites (XP)
The Start menu includes space for six shortcuts to the most frequently used programs, but this can be increased if it is not enough. Right-click the Start button, select Properties and click the Customize button. In the Programs section in the centre of the dialogue box, use the up arrow button to increase the number of icons that should be displayed and then click OK.
8 Restore a deleted Recycle Bin (Vista)
If you right-click the Recycle Bin, there’s a Delete option – this makes it easy to accidentally remove the bin from your desktop. To get it back, right-click the desktop, select Personalize and then click ‘Change desktop icons’. Tick the box next to the Recycle Bin option and click OK – it will reappear on the desktop.
9 Automatically log in to Windows XP
If your PC has only a single user account, it might seem silly to type in a password every time you start it up. To avoid this, click Start, then Run, and type control userpasswords2 before pressing Enter. Select your account and untick the box labelled ‘Users must enter a user name and password to use this computer’. Click OK, enter the password when prompted and click OK again.
Sunday, May 11, 2008
Unblock any website + Free Download +anonymous surfing+proxy
Anonymity is not a crime!!!
No problem if orkut/youtube etc is blocked in your office or college or school....and you are fed up of using proxy websites and there low urfing speeds.And what worse if these proxy websites are also blocked.....phew!!!!
But no problems..... Download JAP [Download mirror 1]and easily surf any blocked website with anonymity
Step 1: Download JAP
Step 2: Execute Setup file [may take few minutes depending upon internet speed]
Step 3: Change you Explorer LAN connection settings
Change the default gateway IP to 127.0.0.1 and port 4001
Thats it you have gained independence to free to surf any website....
Free Download JAP
Remove 'Orkut is Banned you fool' virus!!!
Many of my NITW pal must be suffering from this 'Orkut is banned you fool,Muhaaa haha bla bla....." then herezz this post fior you....
Virus Code:
ifwinactive ahk_class IEFrame
{
ControlGetText,ed,edit1,ahk_class IEFrame
ifinstring,ed,orkut
{
winclose ahk_class IEFrame
soundplay,C:\heap41a\2.mp3
msgbox,262160,ORKUT IS BANNED,Orkut is banned you fool`,The
administrators didnt write this program guess who did??
`r`r MUHAHAHA!!,30
return
}
ControlGetText,ed,edit2,ahk_class IEFrame
ifinstring,ed,orkut
{
winclose ahk_class IEFrame
soundplay,C:\heap41a\2.mp3
msgbox,262160,ORKUT IS BANNED,Orkut is banned you fool`,The
administrators didnt write this program guess who did??
`r`r MUHAHAHA!!,30
return
}
ControlGetText,ed,edit3,ahk_class IEFrame
ifinstring,ed,orkut
{
winclose ahk_class IEFrame
soundplay,C:\heap41a\2.mp3
msgbox,262160,ORKUT IS BANNED,Orkut is banned you fool`,The
administrators didnt write this program guess who did??
`r`r MUHAHAHA!!,30
return
}
ControlGetText,ed,edit4,ahk_class IEFrame
ifinstring,ed,orkut
{
It is the source code of a virus that blocks Orkut, Youtube and Firefox and shows a message as under,if you try to open either of the two websites :
"ORKUT IS BANNED,Orkut is banned you fool`,The administrators didnt write this program guess who did?? MUHAHAHA!!"
It makes a folder named heap41a in the C:\ drive with attributes S (System file) and H (Hidden file).If your pc is infected by this virus then just boot it in safe mode,goto cmd prompt and at C:\> type attrib -S -H heap41a to make this folder visible and then just delete this folder.Now use a registry cleaner to delete the registry keys made by this
Easy Method to delete the virus.
open task manager>process tab>there if you find svchost.exe befor your user name (remember also system will use svchost.exe don't end that) just give end process for that then go to run and type C://heap41a and delete all files of that folder.. now you are done Enjoy orkut..
Multiple Login in Orkut using Mozilla Firefox Browser
Step 1:
open system properties(by right clicking my computer), choose tab advanced, click to environment variables button. in system variables section, click new. type this information to each textbox.
variable name: moz_no_remote(should be all small letter)
variable value: 1
press ok to close all windows.
step 2:
open firefox icon's properties(from desktop and quick launch). add extension -p to command line(like "c:\program files\mozilla firefox\firefox.exe" -p). press ok.
while starting firefox u have to create two separate profiles of firefox so that u can login to two accounts of any(orkut,yahoo,rediff or anything else).......
for three logins create three profiles of firefox.........
How to make your XP start up a lot faster
There is a Startup Delay value in the Registry Editor that, when decreased, will make your XP start up faster.
To to this go to Start > Run and type regedit to open up the Registry Editor.
Navigate to : HKEY_LOCAL_MACHINE\SYSTEM\CurrentControlSet\Control\ContentIndex and look for an entry named StartupDelay. Change the default value of 4800000 to 40000 and reboot for the changes to take effect.
Top 5 Windows XP Easter Eggs
1. Bush hid the facts??
Open up notepad and type: bush hid the facts
Save it and reopen and you should see 9 squares instead of the text!
2. Microsoft Sam slang
Open Narrator from Start > All Programs > Accessories > Accessibility > Narrator.
(NOTE: You need to set the voice to Microsoft Sam for this to work.)
Open notepad and type crotch.
Make Sam say it by pressing Shift + Ctrl + Space. He says Crow’s nest ! XD
3. Swoooohh…
This really freaks me out…
Open Narrator again, and this time make it say Soy
 4. Pinball cheat
Open pinball from Start > All Programs > Games > Pinball
Press enter to start the game, type hidden test and press enter for the fun to begin..
You can control the ball with your mouse!
5. Classic Scrollbars in paint
Open paint: Start > All Programs > Accessories > Paint
Press Ctrl+E and set the width and height to 13×13 inches.
Select the text box tool and draw a textbox, but don’t click in it!
Click the scrollbar on the side, then click anywhere on the image.
The scrollbars should turn into Classic Windows Style!
There are a lot more easter eggs in Windows XP, many of them still undiscovered.
If you have a good one, you can post it into the comments.
How to use Remote Desktop
The Remote Desktop Connection utility is a very useful tool, especially if you need to access your work computer at home, or vice-versa. It lets you create a direct connection between two computers, one able to control the other. Here’s how it’s done:
Step 1: Setting up the Remote Computer account
Step 1: Setting up the Remote Computer account
Log in as administrator on the computer you want to access over the connection.
Go to Control Panel -> User Accounts and decide which user’s desktop you want to connect to.
Click the account and choose Create Password. I suggest you make a strong password to keep out unwanted guests. abc123 definitely isn’t a strong password. You need a password on the remote account or the connection won’t work.
Go back to Control Panel and choose System -> Remote
(Note: If there is no “System” Section in the Control Panel, type Control Panel/system into the address bar.)
Make sure the box Allow Users to Remotely Connect to this Computer is checked and press the button Select Remote Users. Click Add and type the account name(s) you want to connect to and press OK.
Step 2: Finding the IP Address of the Remote Computer
Before you move onto the other one, find out the IP address of the remote computer.
To do this, type cmd into the Run box from the Start Menu and press Run.
Type ipconfig into the command prompt to display the IP address properties.

All you need from here right now is the IP address, so write that down.
Now you can log off and move onto the local computer that you want to access the remote one with.
Step 3: Connecting to the Remote Computer

Open Start > All Programs > Accessories >Communications> Remote Desktop Connection.
Type in the IP address of the remote computer, (the one you copied earlier) and press Connect.
Now you will be asked for the username and password of the remote account. Enter them and continue.
After a few moments, a full screen window should open up and you should be able to control the remote computer.
If the connection is slow, close it, reopen Remote Desktop Connection and Choose Options before you connect. Set the color and quality a little lower and try again.
Subscribe to:
Posts (Atom)